

- Standardize a starting point for new use cases (e.g. “Custom RAG”, “Webhook gateway”, “OAuth-enabled connector”)
- Share a polished demo with colleagues without giving them write access to your workspace
- Bootstrap reference architectures your team can fork and adapt
How templating works
Templates are declared in AI Governance as Template Features on a navigation menu item. The Builder reads the platform navigation to populate its “Create new workspace” screen; every Template Feature shows up as a tile. When the user picks a template, the Builder callsPOST /workspaces/<templateId>/versions/current/duplicate. The duplicate inherits all content but gets a new id, a - Copie suffix in its name (which the user can rename in the next step), and is owned by the cloning user.
Step 1: Polish your source workspace
Before publishing, treat your source as a product:-
Name & description: both are surfaced to the user during template selection. Be concrete:
RAG agent over a public websitebeatsMy template. - Photo / icon: set one in workspace settings. It’s the visual users see in the gallery.
-
Configuration schema: if your template needs the cloning user to provide values (an API base URL, a brand name, etc.), declare them in
config.schema. The Builder will render a form when they instantiate the template. -
Secrets schema: for sensitive values (API keys), declare them in
secrets.schema. The user is prompted at instantiation and the values land in their workspace’s Secrets. - No personal data: clear out test users, real tokens, hard-coded customer ids. Anything that would embarrass you in someone else’s workspace shouldn’t be in the template.
-
Mark it as a template with the toggle in Builder (workspace settings). This provisions two things together: the
templatelabel and two open-read DSUL security rules (readonworkspacesandpages). It’s those security rules — not the label — that authorize users who don’t otherwise have access to the source to duplicate it. Without them, the duplicate call is denied for anyone but the workspace’s own collaborators, and the “Start from template” tile fails silently.
kFoNvfX); you’ll need it in step 2.
The public-duplication grant is the pair of open-read security rules, not the label itself: they grant
read on the workspace and its pages to any authenticated user, which is what lets a non-collaborator clone the source. The resulting workspace is still owned by the cloning user, with default security — the source’s collaborators and custom roles are not inherited, and the open-read rules themselves are stripped from the copy (they carry a REMOVE_ON_DUPLICATE marker). Turn off Mark as template to remove both the label and the rules, immediately stopping new duplications without touching the source content.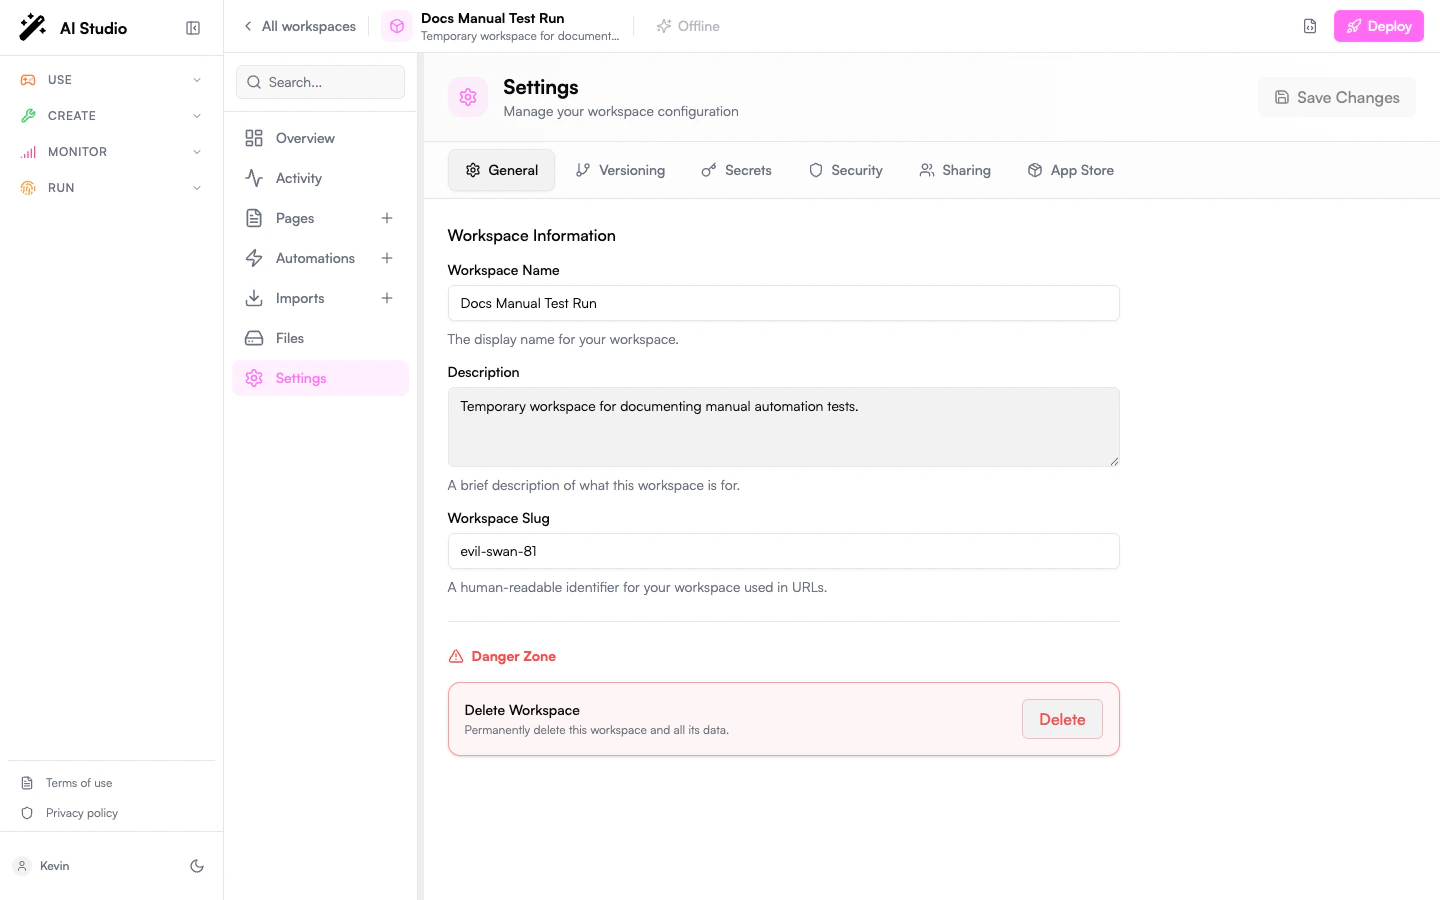
Step 2: Declare it as a Template Feature in AI Governance
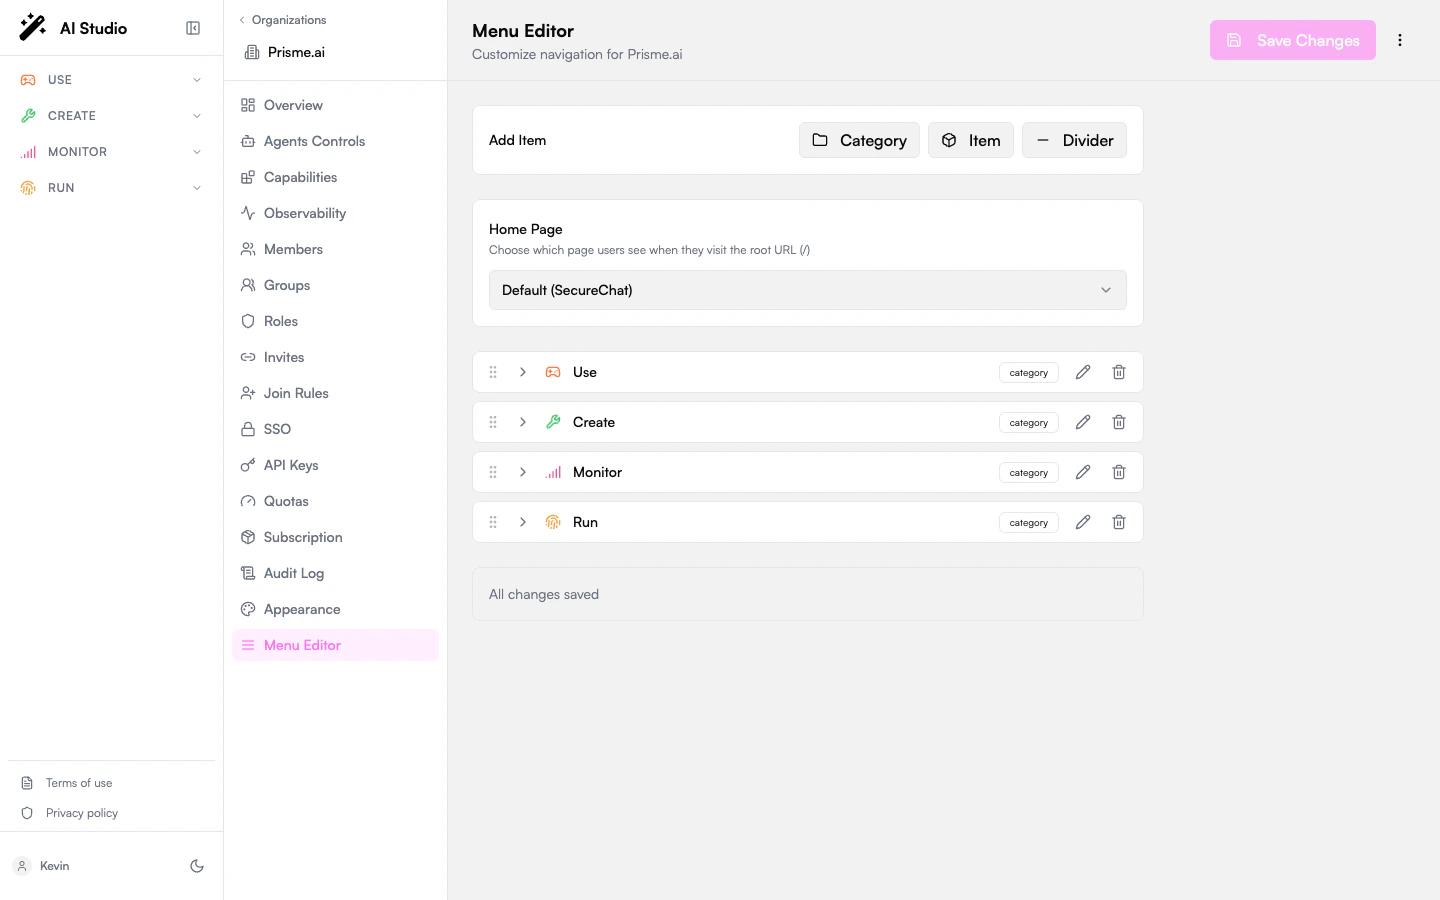
Templates are managed at the organization level via the Menu Editor. Anyone with admin access to the org navigation can publish a template.- Open the Govern product (AI Governance) from the sidebar.
- Go to Menu Editor.
- Open (or create) a menu item where the template should be discoverable. Templates are attached as features of menu items; typically you’d attach them under a “Builder” or “Workspaces” entry.
- Click Add Feature → Template Feature.
- Fill in the four fields:
- Save Changes. The Template ID is validated on save: the feature is rejected unless the id references a workspace that exists, is readable by you, and is declared as a template (carries the
templatelabel). This avoids publishing a tile that would fail at instantiation — or one that only works for you because you can read a workspace others can’t.
Step 3: (Optional) Add a configuration form
If your template needs inputs at instantiation, declare them in the source workspace’sconfig.schema. The Builder renders a form, and the values become accessible inside the cloned workspace as {{config.<field>}}.
{{config.sourceUrl}} reference resolves to their value.
Step 4: Verify the template
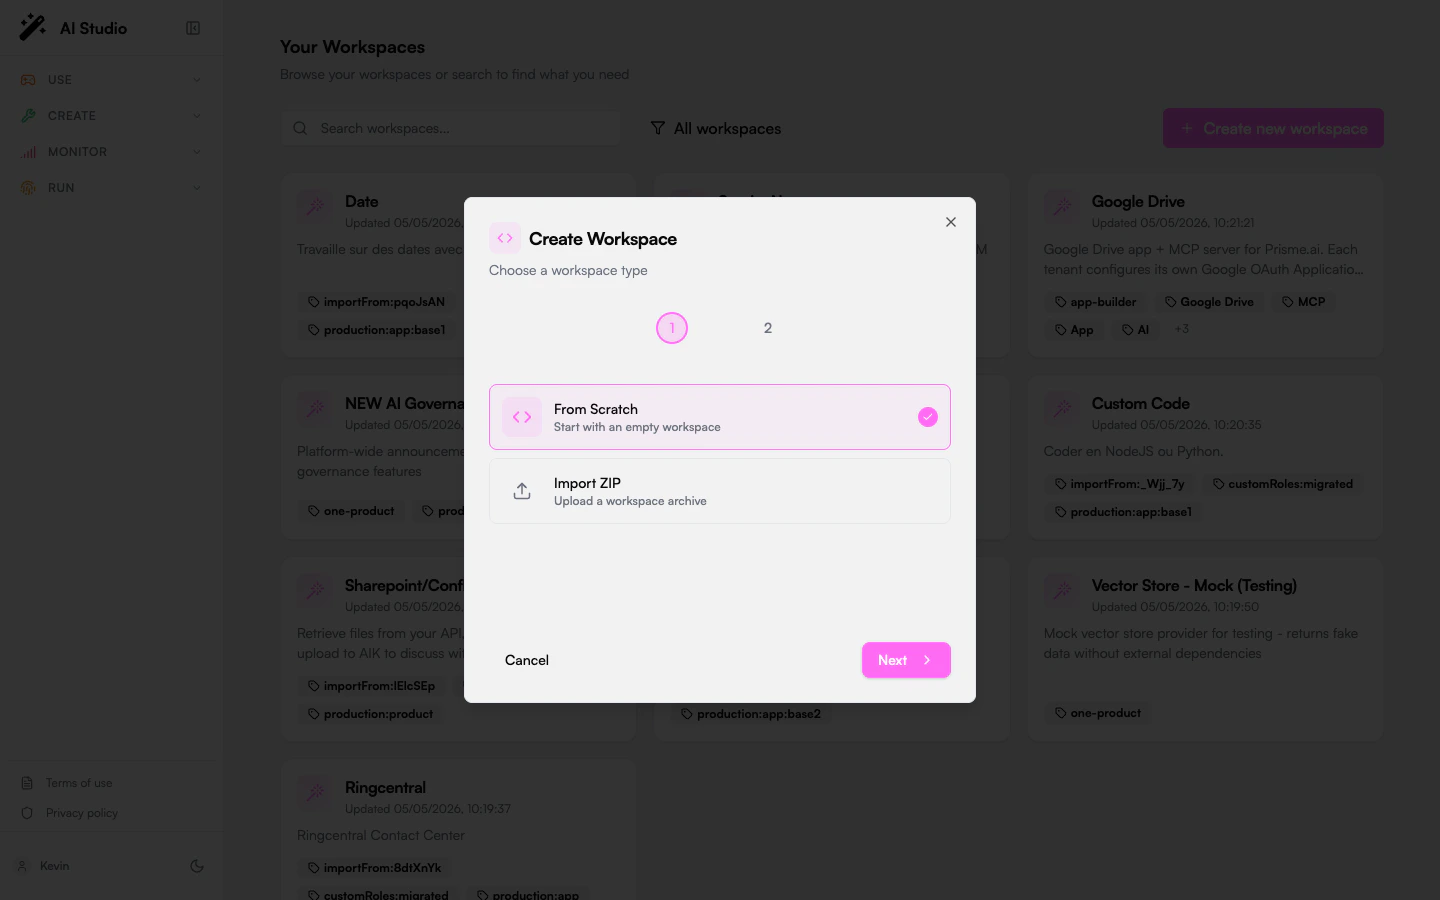
- Open Builder → click New workspace.
- The first step lets users pick a starting point. Your template should appear alongside From scratch and Import ZIP.
- Click your template tile, fill the configuration form (if any), and complete the wizard.
- The new workspace opens in your account; verify it has the expected automations, imports, and config.
Visibility & permissions. Template Features inherit the standard menu-item permission model: if you set
permissions, the tile is visible only to users holding any of the listed permissions. Leave it empty to expose the template to everyone with access to the parent menu item. See Permission-Based Visibility for the full rules.Maintaining a template
A template is just a workspace, so:- Update it like any other workspace; changes are picked up by future “Create new workspace” clicks (existing copies are not modified).
- Use versioning to mark stable releases. Builder always duplicates the
currentversion, so pinning your changes throughcurrentlets you keep iterating on a separate branch. - Retire a template by removing the corresponding Template Feature from the Menu Editor. The source workspace stays intact.
Templates vs publishing as an app
Don’t confuse a template with publishing a workspace as a platform app:
You can do both: a template that users clone for customization and a published app that users open as-is.
Related
Workspaces
Workspace anatomy: configuration, secrets, sharing.
Menu Editor
Where Template Features live, plus the wider menu/navigation model.
Versioning
Pin a template to a stable version while you iterate.
Identity & Access
Permissions model used by the Menu Editor’s visibility filters.