> ## Documentation Index
> Fetch the complete documentation index at: https://docs.prisme.ai/llms.txt
> Use this file to discover all available pages before exploring further.
# Workspaces
## Introduction
This documentation provides an overview of workspaces, detailing configuration, secrets management, version control, events, custom domains, and JSON schema forms. It is designed for advanced technical users looking to effectively manage and utilize workspaces.
## Workspace Configuration
### Basic Configuration
The workspace **config** provides centralized settings and parameters for your entire workspace.
```yaml theme={null}
name: MyConfiguredWorkspace
slug: test
config:
value:
API_URL: https://api.mycompany.com
LOGIN_URL: "{{config.API_URL}}/login"
headers:
apiKey: someAPIKey
```
The `config.value` field is exposed as a `config` variable inside your automations, making these settings accessible throughout your workspace.
You can reference other config values within your configuration using the `{{config.PROPERTY}}` syntax, as shown in the `LOGIN_URL` example above.
### Using Secrets in Configuration
For sensitive configuration values, use secrets:
```yaml theme={null}
config:
value:
API_URL: https://api.mycompany.com
headers:
apiKey: "{{secret.apiKey}}"
```
Secrets provide a secure way to store and use sensitive information like API keys, passwords, and tokens without exposing them in your code.
Secrets with names starting with `prismeai_*` are reserved for super admins to configure system settings by workspace.
### Environment Variables
You can also inject configuration values from environment variables:
```
WORKSPACE_CONFIG_test_API_URL=https://api.mycompany.com
```
This environment variable would set `config.API_URL` for a workspace with the slug "test". Workspace config takes precedence over environment variables.
Similarly, secrets can be injected from environment variables using the `WORKSPACE_SECRET_` prefix:
```
WORKSPACE_SECRET_test_apiKey=sk-xxx
```
This would expose `{{secret.apiKey}}` for a workspace with the slug "test". Workspace-stored secrets take precedence over environment variables.
Apps support the same pattern via the `APP_CONFIG_` and `APP_SECRET_` prefixes (using the app's slug instead of a workspace slug).
### Configuration Schema
For more controlled configuration, especially for Apps, you can define a schema for your config:
```yaml theme={null}
config:
schema:
type: object
properties:
API_URL:
type: string
title: API URL
description: Base URL for the API
maxRetries:
type: number
title: Maximum Retries
default: 3
value:
API_URL: https://api.mycompany.com
maxRetries: 5
```
This schema defines the structure, types, and defaults for your configuration, providing better validation and documentation.
## Workspace Secrets
### What Are Secrets?
Secrets provide a secure way to store sensitive information like API keys, passwords, and access tokens.
### Managing Secrets
Workspaces can have secrets provided through:
* The web interface
* API calls
* CI pipeline integration with an external secrets manager
By default, only workspace owners can access these secrets.
You can manage secrets programmatically using the `/workspaces/:workspaceId/security/secrets` API.
### Declaring and Using Secrets
To use a secret in your workspace, declare it in your workspace configuration schema:
```yaml theme={null}
secrets:
schema:
apiKey:
title: API Key
description: The application Client Id
type: string
ui:widget: password
required: true
```
 *Example: How a secret field (apiKey) appears in the workspace configuration UI. The value is masked for security.*
Reference the secret in your workspace configuration:
```yaml theme={null}
config:
value:
API_URL: https://api.mycompany.com
headers:
apiKey: '{{secret.apiKey}}'
```
Secrets can be used in automations and configuration. The actual value is only visible in the configuration tab and is never displayed in automation execution logs.
Secrets can be used from automations
```
slug: Demo
name: Demo
do:
- set:
name: Demo
value: '{{config.apiKey}}'
# OR
- set:
name: Demo
value: '{{config}}' ## Access the whole config.
output: '{{Demo}}'
```
*Example: How a secret field (apiKey) appears in the workspace configuration UI. The value is masked for security.*
Reference the secret in your workspace configuration:
```yaml theme={null}
config:
value:
API_URL: https://api.mycompany.com
headers:
apiKey: '{{secret.apiKey}}'
```
Secrets can be used in automations and configuration. The actual value is only visible in the configuration tab and is never displayed in automation execution logs.
Secrets can be used from automations
```
slug: Demo
name: Demo
do:
- set:
name: Demo
value: '{{config.apiKey}}'
# OR
- set:
name: Demo
value: '{{config}}' ## Access the whole config.
output: '{{Demo}}'
```
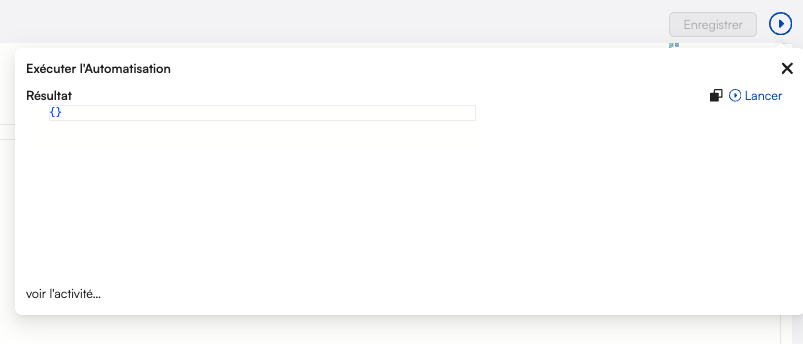 *Example: When running an automation that uses a secret, the value is not exposed in the output.*
#### Secret Redaction in Logs
When secrets are used, their values are automatically redacted (or hidden if access directly) in logs and activity views when acessing the whole config.:
```json theme={null}
{
"slug": "test",
"payload": {},
"output": {
"API_URL": "https://api.mycompany.com",
"headers": {
"apiKey": "REDACTED"
}
},
"duration": 0,
"startedAt": "2025-12-30T19:33:17.562Z",
"trigger": {
"type": "automation",
"value": "test"
},
"break": false
}
```
This ensures that secret values are never exposed, maintaining security.
### Using Secrets in Other Contexts
Secrets can also be used in repository configurations:
```yaml theme={null}
repositories:
github:
name: My Repository
type: git
mode: read-write
config:
url: https://github.com/YourUser/your-repository.git
branch: main
auth:
user: 'your git user'
password: '{{secret.gitPassword}}'
```
Secrets beginning with `prismeai_*` are reserved for super admins to configure system settings.
## Version Control
Workspaces can be synchronized with external Git repositories for collaborative version control. This enables push/pull workflows, merge conflict handling, dirty tracking, bulk operations, and more.
For complete documentation on repository configuration, collaboration workflows, merge conflicts, bulk import/push, and all versioning features, see the dedicated [Versioning](/products/ai-builder/versioning) page.
## Workspace Events
### What Are Events?
Each workspace maintains a continuous real-time stream of events that describe activities and interactions.
### Event Types
Workspaces work with two main types of events:
* **Native Events**: Automatically generated by the platform (updates, webhooks, errors, automation executions, etc.)
* **Custom Events**: Emitted by your automations or installed apps
Events are stored for up to 3 years and can be viewed/searched from the **Activity** view of the workspace.
Events from workspaces inactive for longer than 15 days and with fewer than 100 events are regularly deleted. Events from deleted workspaces are kept for up to 6 months after deletion.
### Event Structure
Every event includes a **type**, **payload** and **source** fields. These contain important information:
* **type**: Type of the given event (can also represent the name of the event)
* **payload**: Payload of the event, contains useful data specific to the event type
* **source.userId**: Authenticated user ID (only set for user-emitted events)
* **source.sessionId**: Session ID shared by all events related to a user session
* **source.correlationId**: Unique ID shared by events related to the same initial trigger
* **source.automationSlug**: Automation that emitted the event
* **source.appInstanceFullSlug**: Source app instance slug (if applicable)
* **source.http**: Source HTTP request details (if applicable)
This information helps track the origin and context of each event.
### Working with Events
Events serve several key purposes in workspaces:
* **Recording Activity**: Maintaining an audit trail of system and user actions
* **Triggering Automations**: Events can start automation workflows
* **Inter-Component Communication**: Components can communicate via events
* **Monitoring and Analytics**: Events provide insights into system usage
For security reasons, events emitted from a nested app (an app installed within another app) will not be visible in the root workspace events feed.
### Activity View
The Activity view provides a real-time window into your workspace events:
* **Filter Events**: Narrow down by event type, source, or time range
* **Inspect Details**: View complete event data including payload and source
* **Track Correlations**: Follow chains of related events
* **Debug Issues**: Identify problems by examining event flows
This view is invaluable for monitoring, debugging, and understanding your workspace's behavior.
### Event Retention Policy
Events from workspaces inactive for longer than 15 days and with fewer than 100 events are regularly deleted. Events from deleted workspaces are kept for up to 6 months after deletion.
## Custom Domains
### Step-by-Step Guide
You can attach a custom domain to your workspace to display pages under your own domain name.
Add a CNAME entry to your domain pointing to `pages.prisme.ai`
For root domains, use an ALIAS record instead of a CNAME.
Add the domain to your workspace configuration:
```yaml theme={null}
customDomains:
- www.example.com
```
For Enterprise version, contact support to complete the setup.
[Contact Support](mailto:support@prisme.ai)
## JSON Schema Form
### Basic Schema Form
Workspace configuration often uses JSON Schema Form, a standard for creating declarative complex forms. This is particularly important for app configuration.
A schema form starts with a single field, typically of type "object":
```yaml theme={null}
type: 'object'
properties:
firstname:
type: string
lastname:
type: string
```
This creates a form with two fields, producing an object with "firstname" and "lastname" properties.
### Field Types
Fields can have various types:
* **string**: Text input
* **localized:string**: Translatable text
* **number**: Numeric input
* **localized:number**: Translatable numbers
* **boolean**: Switch button
* **localized:boolean**: Translatable booleans
* **object**: Nested object with properties
* **array**: List of items
Additional attributes include:
* **title**: Field label
* **description**: Help text
* **default**: Default value
* **enum**: List of allowed values
* **enumNames**: Display labels for enum values
* **required**: Whether the field is required
* **pattern**: Validation regex
* **hidden**: Whether to hide the field
### Advanced Features
Schema forms support advanced features:
**Custom Widgets**
```yaml theme={null}
properties:
description:
type: string
ui:widget: textarea
birthdate:
type: string
ui:widget: date
color:
type: string
ui:widget: color
```
**Conditional Fields (oneOf)**
```yaml theme={null}
properties:
paymentType:
oneOf:
- title: Credit Card
value: creditCard
properties:
cardNumber:
type: string
title: Card Number
- title: Bank Transfer
value: bankTransfer
properties:
accountNumber:
type: string
title: Account Number
```
**Arrays and Objects**
```yaml theme={null}
properties:
contacts:
type: array
title: Contacts
items:
type: object
properties:
name:
type: string
email:
type: string
```
### Form Validation
Schema forms include validation rules. Each rule can just have a true value to display default message with default behavior but can also be an object with value and message. A field can have many validators. The list of validators is:
* required: the value is required
* min: the value as number must be greater than validator value
* max: the value as number must be lower than validator value
* email: the value must be a valid email address
* tel: the value must be a valid phone number
* date: the value must be a valid Date
* minLength: the value as string must have a greater length than validator value
* maxLength: the value as string must have a lower length than validator value
* pattern: the value must match the regular expression set in validator value.
The following example shows some implementations of validators:
```yaml theme={null}
properties:
foo:
type: string
validators:
required: true
bar:
type: string
validators:
required:
message:
en: Value is mandatory. Please fill it.
fr: La valeur est obligatoire. Merci de la renseigner.
value: true
email:
type: string
validators:
email: true
password:
type: string
title: Password
ui:widget: password
validators:
required: true
minLength:
value: 8
message: Password must be at least 8 characters
```
### Complete Example
Here's a more complete schema form example:
```yaml theme={null}
type: object
title: My Cool Form
description: This is an example of form
properties:
firstName:
type: string
title: Firstname
lastName:
type: string
title: Lastname
birthdate:
type: string
ui:widget: date
title: Birthdate
genre:
type: string
title: Genre
enum:
- 1
- 2
- 3
enumNames:
- Man
- Woman
- Other
address:
type: string
ui:widget: textarea
hobbies:
type: object
title: Your hobbies
properties:
favoriteMusic:
type: array
title: Favorite music
items:
type: string
title: Type an artist name
```
This form collects personal information with various field types and widgets.
## Project Templates
A **template** is a workspace that other users can clone from the **Create new workspace** screen in Builder. Templates are the way the platform ships ready-to-use starting points — your team's, or the ones bundled with your deployment.
### Cloning a template
From the Builder home, click **Create new workspace**. The wizard offers three sources:
| Source | What you get |
| -------------------------- | ------------------------------------------------------------------------------------------------------------------------------------------------------------------------------ |
| **From scratch** | An empty workspace with two auto-generated automations (`v1/status` and `on-app-greeting-requested`) so the deploy pipeline has something to publish on day one. |
| **From a template** | A fresh workspace pre-loaded with the template's automations, pages, imports, security, and (optionally) a configuration form that asks for parameters specific to your clone. |
| **From an archive (.zip)** | Imports a workspace export. Used to migrate workspaces between instances; see [Versioning → Export/Import](/products/ai-builder/versioning#versioning-tab-ui). |
A clone is a full copy: it gets its own ID, slug, secrets, and event history. Updates to the source template do **not** propagate to existing clones — the lineage is one-shot.
### What a template carries vs leaves blank
| Carried over | Replaced or blank in the clone |
| ----------------------------------------------------------- | ---------------------------------------------------------------------------------- |
| Automations, pages, imports, RBAC, custom code | New workspace ID, slug, and name |
| Workspace `index.yml` (config, secret schema, repositories) | Secret **values** — only the schema is cloned; the clone starts with empty secrets |
| Labels, description, icon | Membership — the clone starts with only the user who cloned it |
| Template's configuration form (if declared) | Files (uploads) and runtime data (events, collections) |
If the template declares a **configuration form**, the wizard renders it before creating the clone, and the answers are written into the new workspace's `config` block (`{{config.*}}`) and/or secret values. This is how templates can ship parameterized starting points (e.g. "Slack incident bot — paste your Slack webhook").
### Catalog of available templates
Which templates appear in the wizard depends on your deployment:
* **Org-published templates** — workspaces your org admins have promoted to template status from **Govern → Menu Editor**. These are the most common ones in production.
* **Platform-bundled templates** — depending on the version of the platform, a handful of starter templates may ship with the deployment (typically empty React/Vite scaffolds, a webhook demo, and a chat agent demo). Check **Create new workspace** for the current list.
### Reference starter: `starter-spa`
Outside the in-Builder wizard, the open-source [`prismeai/starter-spa`](https://github.com/prismeai/starter-spa) repo is the canonical "very simple app" — a fully working React + Radix + Tailwind SPA wired to two backend automations (a REST webhook and an event listener). Clone it, run `npm run release`, and your workspace ends up with the same files the Builder would have seeded.
The starter is the easiest reference when:
* A non-template workspace needs a known-good baseline to copy automations or React code from.
* You want to demonstrate the platform's host contract without building anything from scratch.
* A team prefers an IDE + Git + CI flow to the in-Builder editor.
See [Pages → Build Locally](/products/ai-builder/pages#build-locally-the-starter-spa-reference-app) for the integration details.
### Publishing your own template
Once a workspace is polished, an org admin can publish it as a template so other users can clone it. The publishing step happens in **Govern → Menu Editor**.
A condensed checklist:
1. **Polish the workspace** — remove dev-only secrets, add documentation, label it.
2. **Declare it as a Template Feature** in **Govern → Menu Editor**: pick the source workspace, choose the label visible in the wizard, and (optionally) attach a configuration form (see [JSON Schema Form](#json-schema-form)).
3. **Verify** by cloning the template yourself — make sure the clone runs without manual fixup.
See [Workspace Templates](/products/ai-governance/workspace-templates) for the full step-by-step walkthrough, including how to gate templates with feature flags and how to maintain them across versions.
### Templates vs apps
Templates and apps both let one workspace be reused, but they solve different problems:
| | Template | App |
| ----------------------------- | ------------------------------------------------ | ----------------------------------------------------------------------------------------------- |
| Reuse model | Clone-once, then the clone is fully independent. | Installed as an import; updates can be pulled. |
| Edits in the source workspace | Do **not** affect existing clones. | Versioning lets app consumers pull a new version. |
| Use it for | Starter projects, opinionated scaffolds. | Reusable building blocks (an integration, an agent capability) consumed by multiple workspaces. |
If end users will build *on top* of a template, publish it as a template. If end users will *configure and call* it as a black box, publish it as an app.
## Next Steps
Create backend processes and workflows
Build interactive user interfaces
Publish a workspace others can clone as a starting point
*Example: When running an automation that uses a secret, the value is not exposed in the output.*
#### Secret Redaction in Logs
When secrets are used, their values are automatically redacted (or hidden if access directly) in logs and activity views when acessing the whole config.:
```json theme={null}
{
"slug": "test",
"payload": {},
"output": {
"API_URL": "https://api.mycompany.com",
"headers": {
"apiKey": "REDACTED"
}
},
"duration": 0,
"startedAt": "2025-12-30T19:33:17.562Z",
"trigger": {
"type": "automation",
"value": "test"
},
"break": false
}
```
This ensures that secret values are never exposed, maintaining security.
### Using Secrets in Other Contexts
Secrets can also be used in repository configurations:
```yaml theme={null}
repositories:
github:
name: My Repository
type: git
mode: read-write
config:
url: https://github.com/YourUser/your-repository.git
branch: main
auth:
user: 'your git user'
password: '{{secret.gitPassword}}'
```
Secrets beginning with `prismeai_*` are reserved for super admins to configure system settings.
## Version Control
Workspaces can be synchronized with external Git repositories for collaborative version control. This enables push/pull workflows, merge conflict handling, dirty tracking, bulk operations, and more.
For complete documentation on repository configuration, collaboration workflows, merge conflicts, bulk import/push, and all versioning features, see the dedicated [Versioning](/products/ai-builder/versioning) page.
## Workspace Events
### What Are Events?
Each workspace maintains a continuous real-time stream of events that describe activities and interactions.
### Event Types
Workspaces work with two main types of events:
* **Native Events**: Automatically generated by the platform (updates, webhooks, errors, automation executions, etc.)
* **Custom Events**: Emitted by your automations or installed apps
Events are stored for up to 3 years and can be viewed/searched from the **Activity** view of the workspace.
Events from workspaces inactive for longer than 15 days and with fewer than 100 events are regularly deleted. Events from deleted workspaces are kept for up to 6 months after deletion.
### Event Structure
Every event includes a **type**, **payload** and **source** fields. These contain important information:
* **type**: Type of the given event (can also represent the name of the event)
* **payload**: Payload of the event, contains useful data specific to the event type
* **source.userId**: Authenticated user ID (only set for user-emitted events)
* **source.sessionId**: Session ID shared by all events related to a user session
* **source.correlationId**: Unique ID shared by events related to the same initial trigger
* **source.automationSlug**: Automation that emitted the event
* **source.appInstanceFullSlug**: Source app instance slug (if applicable)
* **source.http**: Source HTTP request details (if applicable)
This information helps track the origin and context of each event.
### Working with Events
Events serve several key purposes in workspaces:
* **Recording Activity**: Maintaining an audit trail of system and user actions
* **Triggering Automations**: Events can start automation workflows
* **Inter-Component Communication**: Components can communicate via events
* **Monitoring and Analytics**: Events provide insights into system usage
For security reasons, events emitted from a nested app (an app installed within another app) will not be visible in the root workspace events feed.
### Activity View
The Activity view provides a real-time window into your workspace events:
* **Filter Events**: Narrow down by event type, source, or time range
* **Inspect Details**: View complete event data including payload and source
* **Track Correlations**: Follow chains of related events
* **Debug Issues**: Identify problems by examining event flows
This view is invaluable for monitoring, debugging, and understanding your workspace's behavior.
### Event Retention Policy
Events from workspaces inactive for longer than 15 days and with fewer than 100 events are regularly deleted. Events from deleted workspaces are kept for up to 6 months after deletion.
## Custom Domains
### Step-by-Step Guide
You can attach a custom domain to your workspace to display pages under your own domain name.
Add a CNAME entry to your domain pointing to `pages.prisme.ai`
For root domains, use an ALIAS record instead of a CNAME.
Add the domain to your workspace configuration:
```yaml theme={null}
customDomains:
- www.example.com
```
For Enterprise version, contact support to complete the setup.
[Contact Support](mailto:support@prisme.ai)
## JSON Schema Form
### Basic Schema Form
Workspace configuration often uses JSON Schema Form, a standard for creating declarative complex forms. This is particularly important for app configuration.
A schema form starts with a single field, typically of type "object":
```yaml theme={null}
type: 'object'
properties:
firstname:
type: string
lastname:
type: string
```
This creates a form with two fields, producing an object with "firstname" and "lastname" properties.
### Field Types
Fields can have various types:
* **string**: Text input
* **localized:string**: Translatable text
* **number**: Numeric input
* **localized:number**: Translatable numbers
* **boolean**: Switch button
* **localized:boolean**: Translatable booleans
* **object**: Nested object with properties
* **array**: List of items
Additional attributes include:
* **title**: Field label
* **description**: Help text
* **default**: Default value
* **enum**: List of allowed values
* **enumNames**: Display labels for enum values
* **required**: Whether the field is required
* **pattern**: Validation regex
* **hidden**: Whether to hide the field
### Advanced Features
Schema forms support advanced features:
**Custom Widgets**
```yaml theme={null}
properties:
description:
type: string
ui:widget: textarea
birthdate:
type: string
ui:widget: date
color:
type: string
ui:widget: color
```
**Conditional Fields (oneOf)**
```yaml theme={null}
properties:
paymentType:
oneOf:
- title: Credit Card
value: creditCard
properties:
cardNumber:
type: string
title: Card Number
- title: Bank Transfer
value: bankTransfer
properties:
accountNumber:
type: string
title: Account Number
```
**Arrays and Objects**
```yaml theme={null}
properties:
contacts:
type: array
title: Contacts
items:
type: object
properties:
name:
type: string
email:
type: string
```
### Form Validation
Schema forms include validation rules. Each rule can just have a true value to display default message with default behavior but can also be an object with value and message. A field can have many validators. The list of validators is:
* required: the value is required
* min: the value as number must be greater than validator value
* max: the value as number must be lower than validator value
* email: the value must be a valid email address
* tel: the value must be a valid phone number
* date: the value must be a valid Date
* minLength: the value as string must have a greater length than validator value
* maxLength: the value as string must have a lower length than validator value
* pattern: the value must match the regular expression set in validator value.
The following example shows some implementations of validators:
```yaml theme={null}
properties:
foo:
type: string
validators:
required: true
bar:
type: string
validators:
required:
message:
en: Value is mandatory. Please fill it.
fr: La valeur est obligatoire. Merci de la renseigner.
value: true
email:
type: string
validators:
email: true
password:
type: string
title: Password
ui:widget: password
validators:
required: true
minLength:
value: 8
message: Password must be at least 8 characters
```
### Complete Example
Here's a more complete schema form example:
```yaml theme={null}
type: object
title: My Cool Form
description: This is an example of form
properties:
firstName:
type: string
title: Firstname
lastName:
type: string
title: Lastname
birthdate:
type: string
ui:widget: date
title: Birthdate
genre:
type: string
title: Genre
enum:
- 1
- 2
- 3
enumNames:
- Man
- Woman
- Other
address:
type: string
ui:widget: textarea
hobbies:
type: object
title: Your hobbies
properties:
favoriteMusic:
type: array
title: Favorite music
items:
type: string
title: Type an artist name
```
This form collects personal information with various field types and widgets.
## Project Templates
A **template** is a workspace that other users can clone from the **Create new workspace** screen in Builder. Templates are the way the platform ships ready-to-use starting points — your team's, or the ones bundled with your deployment.
### Cloning a template
From the Builder home, click **Create new workspace**. The wizard offers three sources:
| Source | What you get |
| -------------------------- | ------------------------------------------------------------------------------------------------------------------------------------------------------------------------------ |
| **From scratch** | An empty workspace with two auto-generated automations (`v1/status` and `on-app-greeting-requested`) so the deploy pipeline has something to publish on day one. |
| **From a template** | A fresh workspace pre-loaded with the template's automations, pages, imports, security, and (optionally) a configuration form that asks for parameters specific to your clone. |
| **From an archive (.zip)** | Imports a workspace export. Used to migrate workspaces between instances; see [Versioning → Export/Import](/products/ai-builder/versioning#versioning-tab-ui). |
A clone is a full copy: it gets its own ID, slug, secrets, and event history. Updates to the source template do **not** propagate to existing clones — the lineage is one-shot.
### What a template carries vs leaves blank
| Carried over | Replaced or blank in the clone |
| ----------------------------------------------------------- | ---------------------------------------------------------------------------------- |
| Automations, pages, imports, RBAC, custom code | New workspace ID, slug, and name |
| Workspace `index.yml` (config, secret schema, repositories) | Secret **values** — only the schema is cloned; the clone starts with empty secrets |
| Labels, description, icon | Membership — the clone starts with only the user who cloned it |
| Template's configuration form (if declared) | Files (uploads) and runtime data (events, collections) |
If the template declares a **configuration form**, the wizard renders it before creating the clone, and the answers are written into the new workspace's `config` block (`{{config.*}}`) and/or secret values. This is how templates can ship parameterized starting points (e.g. "Slack incident bot — paste your Slack webhook").
### Catalog of available templates
Which templates appear in the wizard depends on your deployment:
* **Org-published templates** — workspaces your org admins have promoted to template status from **Govern → Menu Editor**. These are the most common ones in production.
* **Platform-bundled templates** — depending on the version of the platform, a handful of starter templates may ship with the deployment (typically empty React/Vite scaffolds, a webhook demo, and a chat agent demo). Check **Create new workspace** for the current list.
### Reference starter: `starter-spa`
Outside the in-Builder wizard, the open-source [`prismeai/starter-spa`](https://github.com/prismeai/starter-spa) repo is the canonical "very simple app" — a fully working React + Radix + Tailwind SPA wired to two backend automations (a REST webhook and an event listener). Clone it, run `npm run release`, and your workspace ends up with the same files the Builder would have seeded.
The starter is the easiest reference when:
* A non-template workspace needs a known-good baseline to copy automations or React code from.
* You want to demonstrate the platform's host contract without building anything from scratch.
* A team prefers an IDE + Git + CI flow to the in-Builder editor.
See [Pages → Build Locally](/products/ai-builder/pages#build-locally-the-starter-spa-reference-app) for the integration details.
### Publishing your own template
Once a workspace is polished, an org admin can publish it as a template so other users can clone it. The publishing step happens in **Govern → Menu Editor**.
A condensed checklist:
1. **Polish the workspace** — remove dev-only secrets, add documentation, label it.
2. **Declare it as a Template Feature** in **Govern → Menu Editor**: pick the source workspace, choose the label visible in the wizard, and (optionally) attach a configuration form (see [JSON Schema Form](#json-schema-form)).
3. **Verify** by cloning the template yourself — make sure the clone runs without manual fixup.
See [Workspace Templates](/products/ai-governance/workspace-templates) for the full step-by-step walkthrough, including how to gate templates with feature flags and how to maintain them across versions.
### Templates vs apps
Templates and apps both let one workspace be reused, but they solve different problems:
| | Template | App |
| ----------------------------- | ------------------------------------------------ | ----------------------------------------------------------------------------------------------- |
| Reuse model | Clone-once, then the clone is fully independent. | Installed as an import; updates can be pulled. |
| Edits in the source workspace | Do **not** affect existing clones. | Versioning lets app consumers pull a new version. |
| Use it for | Starter projects, opinionated scaffolds. | Reusable building blocks (an integration, an agent capability) consumed by multiple workspaces. |
If end users will build *on top* of a template, publish it as a template. If end users will *configure and call* it as a black box, publish it as an app.
## Next Steps
Create backend processes and workflows
Build interactive user interfaces
Publish a workspace others can clone as a starting point