> ## Documentation Index
> Fetch the complete documentation index at: https://docs.prisme.ai/llms.txt
> Use this file to discover all available pages before exploring further.
# Custom Tools
> Expose your own HTTP endpoints — typically Builder automations — as tools your agent can call
A **custom tool** lets your agent call any HTTP endpoint you control. The most common pattern is to build the endpoint as a [Builder automation](/products/ai-builder/automations) and plug it into the agent in two minutes — but any reachable URL works (internal API, third-party SaaS, serverless function, etc.).
Custom tools sit alongside MCP servers, Skills, and File Search under the agent's **Capabilities** tab.
**When to pick a custom tool over an MCP server**: an MCP server exposes many tools at once and is reusable across agents. A custom tool is a single endpoint you wire up directly. If you only need one or two specific actions and you already have (or want) a Builder automation, a custom tool is faster.
## How it works
```mermaid theme={null}
flowchart LR
A[Agent] -- "function call (JSON args)" --> B[HTTP POST to your endpoint]
B --> C[Builder automation
or external API]
C -- "JSON response" --> A
```
When the LLM decides to invoke the tool, the platform sends a `POST` to your endpoint with a JSON body containing the arguments. Whatever you return becomes the tool's observation in the conversation.
## Step 1 — Build the endpoint as a Builder automation
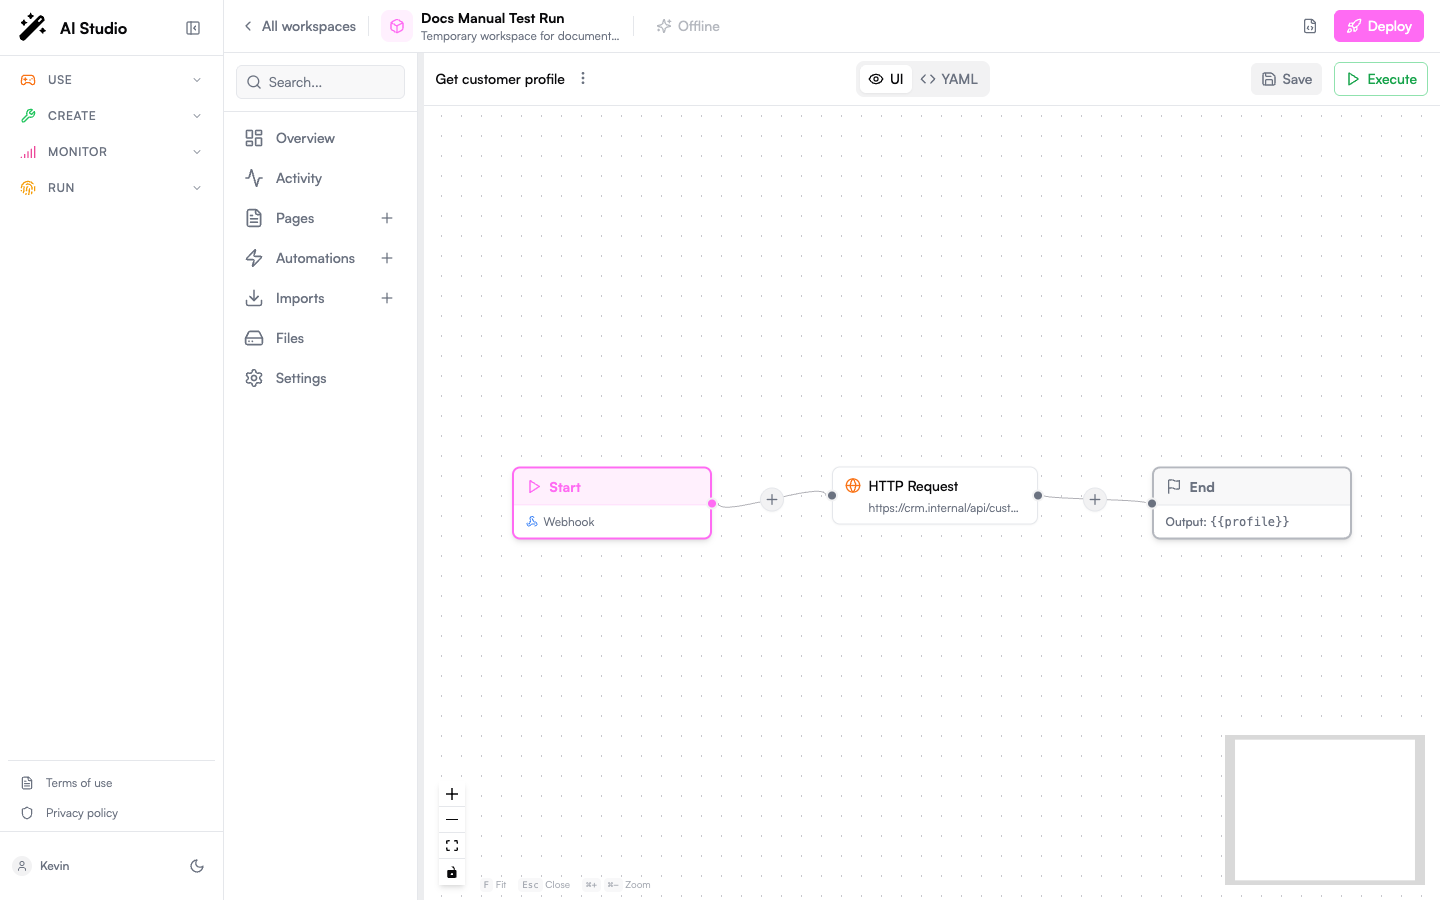
This is the recommended path: you stay inside Prisme.ai, secrets and access control are already handled, and the call shows up in [Activity / Insights](/products/ai-insights/overview).
1. Open your workspace in **Builder**.
2. Create a new automation (e.g. `getCustomerProfile`).
3. Set the trigger to **Endpoint** so the automation is reachable over HTTP.
4. Declare the input schema under **Arguments** — those become the parameters the agent sees.
5. Implement the logic (`fetch`, `Custom Code.run`, `Collection.findMany`, etc.).
6. Set an `output` so the response payload is well-defined.
Minimal example:
```yaml theme={null}
slug: getCustomerProfile
name: Get customer profile
description: Returns a customer profile by id, including subscription status
when:
endpoint: true
arguments:
customerId:
type: string
description: The customer identifier (e.g. cus_12345)
do:
- fetch:
url: 'https://crm.internal/api/customers/{{customerId}}'
headers:
Authorization: 'Bearer {{config.CRM_TOKEN}}'
output: profile
output: '{{profile}}'
```
The endpoint URL is shown next to the trigger in the automation editor — it looks like `https://api.studio.prisme.ai/v2/workspaces//webhooks/getCustomerProfile`. Copy it; you'll paste it into the agent in step 2.
Keep the **description** crisp and action-oriented (`Returns…`, `Creates…`, `Cancels…`). It's the only thing the LLM has to decide whether to call your tool.
 ## Step 2 — Attach the tool to your agent
1. Open the agent in **Agent Creator**.
2. Click the **Capabilities** tab.
3. Click **Add Capability**.
4. Select the **Custom** tab.
5. Pick **Custom Function** (the catalog entry, marked with a ⚡ icon).
A configuration form opens. Fill it in:
| Field | What to put |
| --------------------- | -------------------------------------------------------------------------------------------------------------- |
| **Display Name** | Human-readable label shown in the UI (`Customer profile lookup`) |
| **Function Name** | Unique technical name the LLM uses to call the tool. Snake-case, no spaces (`get_customer_profile`) |
| **Endpoint URL** | The webhook URL from step 1 |
| **Description** | What the function does — this is what the LLM reads to decide when to use it |
| **Headers** | Optional. For Prisme.ai webhooks you don't need any; for external APIs, add `Authorization`, `X-Api-Key`, etc. |
| **Parameters Schema** | A JSON Schema describing the function arguments |
Example **Parameters Schema** for our automation above:
```json theme={null}
{
"type": "object",
"properties": {
"customerId": {
"type": "string",
"description": "The customer identifier (e.g. cus_12345)"
}
},
"required": ["customerId"]
}
```
Click **Add**. The tool now appears under the agent's Capabilities and can be called from the next conversation.
## Step 3 — Update the instructions
The agent doesn't pick up tools just by being attached — your [Instructions](/products/agent-factory/instructions) need to tell it *when* to use them.
> When the user mentions a customer by id or asks about their plan, call `get_customer_profile` with the id, then summarize subscription status, plan tier, and renewal date.
Without this nudge, the LLM may ignore the tool or use it inconsistently.
## Step 4 — Test in the Playground
Open the [Playground](/products/agent-factory/playground) and try a prompt that should trigger the tool. You'll see:
* The function call (name + arguments) the agent decided on
* The raw JSON response from your endpoint
* The agent's final reply built from that response
If the call doesn't fire, sharpen the description and the parameter descriptions — those drive the LLM's tool-selection behavior. If the call fires but errors, open the automation's Activity tab to see the actual request the agent sent.
## Calling an external endpoint instead of a Builder automation
Skip step 1 and point the **Endpoint URL** at any HTTPS endpoint. You typically need to:
* Add an `Authorization` or `X-Api-Key` header in the **Headers** section
* Make sure the endpoint accepts JSON in the body matching your **Parameters Schema**
* Ensure responses are JSON (the agent renders strings as text, but JSON gives it structure to reason over)
For OAuth-based services, prefer wrapping the call in a Builder automation that uses the [Secrets module](/products/ai-builder/module-secrets) to inject the token — this avoids storing credentials inside the agent config.
## Best practices
The LLM sees only `name`, `description`, and the parameter schema. Treat these like a prompt: tell it precisely what the tool does and when to use it. Avoid `tool_1` / `do_thing`.
Use `enum` for fixed sets (e.g. `status: [active, cancelled, trialing]`). Mark required fields. Each parameter description should help the LLM extract the value from the user's message.
`{ "plan": "pro", "renews_on": "2026-08-12" }` is much more useful to the agent than `The customer is on the pro plan and renews on 2026-08-12`. The agent will turn the JSON into prose itself.
On errors, return `{ "error": "customer_not_found", "customerId": "cus_12345" }` rather than an HTTP 500 with no body. The agent can react ("I couldn't find that customer — can you confirm the id?") instead of bailing out.
Resist the temptation to ship a "do\_anything" tool with a `verb` parameter. Multiple narrow tools are easier for the LLM to pick correctly than one fat tool with a switch.
## Editing or removing a tool
In the **Capabilities** tab:
* Click the **gear icon** next to a tool to update its URL, parameters, or description.
* Click the **trash icon** to remove it. Don't forget to update your Instructions if they reference the removed tool.
## Next steps
Learn how to write an automation, declare arguments, and expose a webhook.
Run custom JavaScript or Python inside the automation that powers your tool.
See all capability types — MCP, Skills, File Search, Guardrails, Sub-agents.
Watch tool calls live and tune descriptions until selection is reliable.
## Step 2 — Attach the tool to your agent
1. Open the agent in **Agent Creator**.
2. Click the **Capabilities** tab.
3. Click **Add Capability**.
4. Select the **Custom** tab.
5. Pick **Custom Function** (the catalog entry, marked with a ⚡ icon).
A configuration form opens. Fill it in:
| Field | What to put |
| --------------------- | -------------------------------------------------------------------------------------------------------------- |
| **Display Name** | Human-readable label shown in the UI (`Customer profile lookup`) |
| **Function Name** | Unique technical name the LLM uses to call the tool. Snake-case, no spaces (`get_customer_profile`) |
| **Endpoint URL** | The webhook URL from step 1 |
| **Description** | What the function does — this is what the LLM reads to decide when to use it |
| **Headers** | Optional. For Prisme.ai webhooks you don't need any; for external APIs, add `Authorization`, `X-Api-Key`, etc. |
| **Parameters Schema** | A JSON Schema describing the function arguments |
Example **Parameters Schema** for our automation above:
```json theme={null}
{
"type": "object",
"properties": {
"customerId": {
"type": "string",
"description": "The customer identifier (e.g. cus_12345)"
}
},
"required": ["customerId"]
}
```
Click **Add**. The tool now appears under the agent's Capabilities and can be called from the next conversation.
## Step 3 — Update the instructions
The agent doesn't pick up tools just by being attached — your [Instructions](/products/agent-factory/instructions) need to tell it *when* to use them.
> When the user mentions a customer by id or asks about their plan, call `get_customer_profile` with the id, then summarize subscription status, plan tier, and renewal date.
Without this nudge, the LLM may ignore the tool or use it inconsistently.
## Step 4 — Test in the Playground
Open the [Playground](/products/agent-factory/playground) and try a prompt that should trigger the tool. You'll see:
* The function call (name + arguments) the agent decided on
* The raw JSON response from your endpoint
* The agent's final reply built from that response
If the call doesn't fire, sharpen the description and the parameter descriptions — those drive the LLM's tool-selection behavior. If the call fires but errors, open the automation's Activity tab to see the actual request the agent sent.
## Calling an external endpoint instead of a Builder automation
Skip step 1 and point the **Endpoint URL** at any HTTPS endpoint. You typically need to:
* Add an `Authorization` or `X-Api-Key` header in the **Headers** section
* Make sure the endpoint accepts JSON in the body matching your **Parameters Schema**
* Ensure responses are JSON (the agent renders strings as text, but JSON gives it structure to reason over)
For OAuth-based services, prefer wrapping the call in a Builder automation that uses the [Secrets module](/products/ai-builder/module-secrets) to inject the token — this avoids storing credentials inside the agent config.
## Best practices
The LLM sees only `name`, `description`, and the parameter schema. Treat these like a prompt: tell it precisely what the tool does and when to use it. Avoid `tool_1` / `do_thing`.
Use `enum` for fixed sets (e.g. `status: [active, cancelled, trialing]`). Mark required fields. Each parameter description should help the LLM extract the value from the user's message.
`{ "plan": "pro", "renews_on": "2026-08-12" }` is much more useful to the agent than `The customer is on the pro plan and renews on 2026-08-12`. The agent will turn the JSON into prose itself.
On errors, return `{ "error": "customer_not_found", "customerId": "cus_12345" }` rather than an HTTP 500 with no body. The agent can react ("I couldn't find that customer — can you confirm the id?") instead of bailing out.
Resist the temptation to ship a "do\_anything" tool with a `verb` parameter. Multiple narrow tools are easier for the LLM to pick correctly than one fat tool with a switch.
## Editing or removing a tool
In the **Capabilities** tab:
* Click the **gear icon** next to a tool to update its URL, parameters, or description.
* Click the **trash icon** to remove it. Don't forget to update your Instructions if they reference the removed tool.
## Next steps
Learn how to write an automation, declare arguments, and expose a webhook.
Run custom JavaScript or Python inside the automation that powers your tool.
See all capability types — MCP, Skills, File Search, Guardrails, Sub-agents.
Watch tool calls live and tune descriptions until selection is reliable.